
How to Install Recent Post Widgets with Date and Comments

This time Arlina Design will share a tutorial on How to Install Recent Post Widgets with Date and Comments on Blog. This recent post widget is a widget that serves to display a list of the latest posts on your blog with thumbnails and additional date and number of comments.
For those who want to try it, please follow the simple steps below:
How to Install Recent Post Widgets with Date and Comments
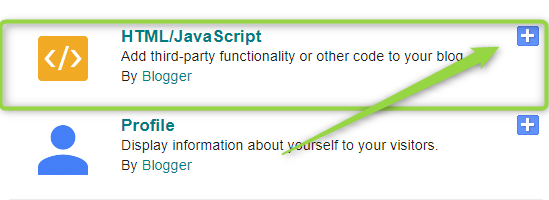
1. Login to Blogger> Click Layout> Create a new Widget then add all the code below in it
<style scoped='' type='text/css'>
#recent-posts{color:#999;font-size:12px}
#recent-posts img{background:#fafafa;float:left;height:60px;margin-right:8px;width:60px;border-radius:4px}
#recent-posts ul{margin:0;padding:0}
#recent-posts ul li{margin:0 0 10px 0;padding:0 0 10px 0;border-bottom:1px solid rgba(0,0,0,0.1)}
#recent-posts ul li:last-child{border-bottom:0}
#recent-posts ul li a{display:block;color:#222;font-weight:700;text-decoration:none;font-size:14px;margin:0 0 10px 0;line-height:normal}
</style>
<div id='recent-posts'>
<script type='text/javaScript'>
var rcp_numposts=5;
var rcp_snippet_length=150;
var rcp_info='yes';
var rcp_comment='Comments';
var rcp_disable='T?t Nh?n xét';
function recent_posts(json){var dw='';a=location.href;y=a.indexOf('?m=0');dw+='<ul>';for(var i=0;i<rcp_numposts;i++){var entry=json.feed.entry[i];var rcp_posttitle=entry.title.$t;if('content'in entry){var rcp_get_snippet=entry.content.$t}else{if('summary'in entry){var rcp_get_snippet=entry.summary.$t}else{var rcp_get_snippet="";}};rcp_get_snippet=rcp_get_snippet.replace(/<[^>]*>/g,"");if(rcp_get_snippet.length<rcp_snippet_length){var rcp_snippet=rcp_get_snippet}else{rcp_get_snippet=rcp_get_snippet.substring(0,rcp_snippet_length);var space=rcp_get_snippet.lastIndexOf(" ");rcp_snippet=rcp_get_snippet.substring(0,space)+"…";};for(var j=0;j<entry.link.length;j++){if('thr$total'in entry){var rcp_commentsNum=entry.thr$total.$t+' '+rcp_comment}else{rcp_commentsNum=rcp_disable};if(entry.link[j].rel=='alternate'){var rcp_posturl=entry.link[j].href;if(y!=-1){rcp_posturl=rcp_posturl+'?m=0'}var rcp_postdate=entry.published.$t;if('media$thumbnail'in entry){var rcp_thumb=entry.media$thumbnail.url}else{rcp_thumb="https://blogger.googleusercontent.com/img/b/R29vZ2xl/AVvXsEi6V46zFyD_sN2BLVoTDj7MdL8dVn7_CnEybfw9UH8Wvgn83zmPjRgugu8vVNgMayV2JzBxpmAovNbEQ41OHimmD7f_zequXsovi9HzvhNed17rw8gsSPYqfpNXXAeq6QEQ33GwH1mZ07L-/"};}};dw+='<li>';dw+='<img alt="'+rcp_posttitle+'" src="'+rcp_thumb+'"/>';dw+='<div><a href="'+rcp_posturl+'" rel="nofollow" title="'+rcp_snippet+'">'+rcp_posttitle+'</a></div>';if(rcp_info=='yes'){dw+='<span>'+rcp_postdate.substring(8,10)+'/'+rcp_postdate.substring(5,7)+'/'+rcp_postdate.substring(0,4)+' - '+rcp_commentsNum+'</span>';};dw+='<div style="clear:both"></div></li>';};dw+='</ul>';document.getElementById('recent-posts').innerHTML=dw;};document.write('<script type=\"text/javascript\" src=\"/feeds/posts/default?alt=json-in-script&max-results='+rcp_numposts+'&callback=recent_posts\"><\/script>');
</script>
</div>2. Save the widget and see the results.
rcp_numposts = 5; = Replace number 5 with the number of posts that will be displayed.
var rcp_snippet_length =150; = The number of characters in the article content that will be displayed when hovering the link title of the post.
rcp_info = 'yes'; = Type"no"to hide the date and number of comments.
rcp_comment = 'Comments'; = Title name of the number of comments.
Re-adjust the display of the widget according to the theme of the blog that you use.
Thus the tutorial How to Install a Recent Post Widget with Date and Comments. May be useful.

Inayah
I really like fishing in murky waters...


