
How to Install the Recent Post Gallery Widget

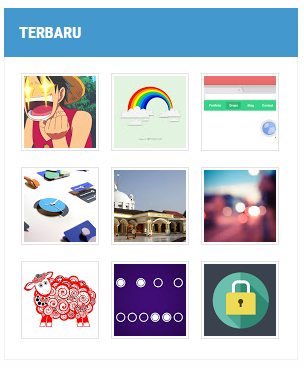
Incidentally, this demo is not included in the widget, so you can see an example display below:
1. Open Blogger> Template> Click Edit HTML> Copy and save the code below just before </ head>
<script type='text/javascript'>
//<![CDATA[
// Recent Post Gallery
function arlinagrid(a){for(var t=a.feed.entry||[],e=['<div class="recent-gallery">'],i=0;i<t.length;++i){for(var l=t[i],r=l.title.$t,n=l.media$thumbnail?l.media$thumbnail.url:"http://2.bp.blogspot.com/-4fCf53FqYKM/Vccsy7apoZI/AAAAAAAAK4o/XJkv3RkC0pw/s1600/default%2Bimage.png",s=n.replace("s72-c","s"+arlina_thumbs+"-c"),h=l.link||[],c=0;c<h.length&&"alternate"!=h[c].rel;++c);var d=h[c].href,m='<img src="'+s+'" width="'+arlina_thumbs+'" height="'+arlina_thumbs+'"/>',p=arlina_title?'<span class="ptitle">'+r+"</span>":"",g='<a href="'+d+'" target="_blank" title="'+r+'">'+m+p+"</a>";e.push('<div class="gallerytem">',g,"</div>")}e.push("</div>"),document.write(e.join(""))}
//]]>
</script>/* CSS Recent Post Gallery */
.recent-gallery {padding:0;clear:both;}
.recent-gallery:after {content:"";display:table;clear:both;}
.recent-gallery .gallerytem{display:inline-block;position:relative;margin:6px 0;overflow:hidden;}
.recent-gallery .gallerytem a{position:relative;float:left;margin:0 6px;text-decoration:none}
.recent-gallery .gallerytem .ptitle{background:rgba(0,0,0,.7);display:block;clear:left;font-size:10px;line-height:1.3em;position:absolute;text-align:left;bottom:3px;left:3px;right:3px;top:3px;color:#fff;padding:5px;word-wrap:break-word;overflow:hidden;visibility:hidden;opacity:0;backface-visibility:hidden;transition:all .2s}
.recent-gallery .gallerytem:hover .ptitle{visibility:visible;opacity:1}
.recent-gallery a img{background:#fdfdfd;float:left;padding:2px;border:1px solid #e3e3e3;transition:all .3s}
.recent-gallery a:hover img {border-color:#bbb;}4. The next step is to open Layout> Add a new widget then copy and save the code below in it:
<script>
var arlina_thumbs = 72;
var arlina_title = true;
</script>
<script src="/feeds/posts/summary?max-results=9&alt=json-in-script&callback=arlinagrid"></script>Information :
- var arlina_thumbs = 72: thumbnail size, change according to taste
- var arlina_title = true: Displays the post title when the cursor selects one post on the thumbnail
- max-results = 9: The number of posts that will be displayed
If you want to display posts by label, please change the feed url above like this:
<script src="/feeds/posts/summary/-/BLOGGER?max-results=9&alt=json-in-script&callback=arlinagrid"></script>BLOGGER is the name of the label that will be displayed.
It's enough about How to Install the Recent Post Gallery Widget, hopefully useful.

Inayah
I really like fishing in murky waters...


